Thought I would share my experience in fitting the Rally Raid Adventure Level 3 upgrade kit. Also fitted the Fat Bars and Bark Buster Fat Bar Guards and Storm shields.
First, why buy the CB500X, throw away all the suspension, and then fit Rally Raid. To be honest I was going to buy an Africa Twin. I Live in London but love touring. I have been down to the Sahara and back a coupe of times and I am in love with Morocco, especially riding across the Atlas mountains, particularly the Tiz n Test pass. All this on a 2000 BMW R1200C.
I am new to off roading and want to enjoy more of the beaten tracks and off road adventure. I took advice from some really experienced riders, especially John Faulton of www.wildcat-adventures.co.uk, a great tour company and a man that has ridden everything. It was John that pointed me in the direction of The 500X and Rally Raid. His reasoning is that the Rally Raid version allows good motorway riding but then allows real off roading in tough environments. Also, I will be doing some touring on my own (Riding to Helsinki and back in a few weeks time) so I wanted something very manageable that I could pick up easily if I dropped it ( I am at the back end of 50).
Also, I went of a 2 day training course at the Honda Adventure Centre in Wales http://www.honda.co.uk/motorcycles/ride-with-us/adventure-centre.html What an amazing couple of days. Instantly put at ease by the genial instructors, they could not be more helpful. Once we arrived at the off road section the instructors then graded all of the attendees by making us go up and down a gentle slalom course. They first told us how to stand on the pegs and lean to steer the bikes. I think the grading into the 3 groups was spot on. This was my first time off road and I was in the stage 1 group. Our instructor broke down the days riding into small sections. Before each section we would stop and he would go through in good detail how we should manage each section, down to road poison, gearing, breaking and traction control settings. Each section became progressively tougher, I think the progression curve was spot on. Some of the sections were designed in loops, so you could do several circuits to get to grips with technique and fine tune your skills.
But it was clear, that despite the Africa Twin being a great bike it really was too heavy for me and that was unladen, what would it be like fully loaded with camping gear etc..
So I did some more research and watched the you tube videos made by Juan Browne
Jenny Morgan about what the bike can do and how to fit the Rally Raid kit. I even visited Rally Raid to meet the people and have a look round. They are really nice people.
I am a planner and it is a good job I am. Rally Raid have become a victim of their own success and there are some long lead times on parts. So if you are buying then make sure you allow plenty of time.
All the bits are of great quality. The kit is designed to be fitted by a novice, which I am. It is all swap out/in and the instruction as really easy to follow. I will say that some bits are quite tricky. I do have a great selection of tools, but I had to improvise a couple of times.
I am not going to cover the swap in detail, only some highlights (Juan Browne on you-tube does a far better job than I could ever do).
Rear Shock
All bikes in the UK have ABS and this makes access a little more tricky, especially for the shock top bolt. I ordered the shock with the Tractive Hydraulic Preload fitted. So not only do you have a heavy shock to lift but one with two remote hydraulic units to locate. I had to sit there for a while to make sure where it was going to fit and how to thread what in what oder through the bike to get it all to fit properly. But as I have mentioned, the instructions are great. So, all in position and now lift the shock to insert the top pin. Now it may be just me, but I think this is a two man job on the ABS version as it is all a little tight up there and just difficult to see and feel what is going on. So I had to improvise.
The hammer in the photo is used to leaver up the base of the shock. Wiggling the hammer handle with one hand allowed me to get enough movement to the top of the shock to line up the holes and push the top bolt in.
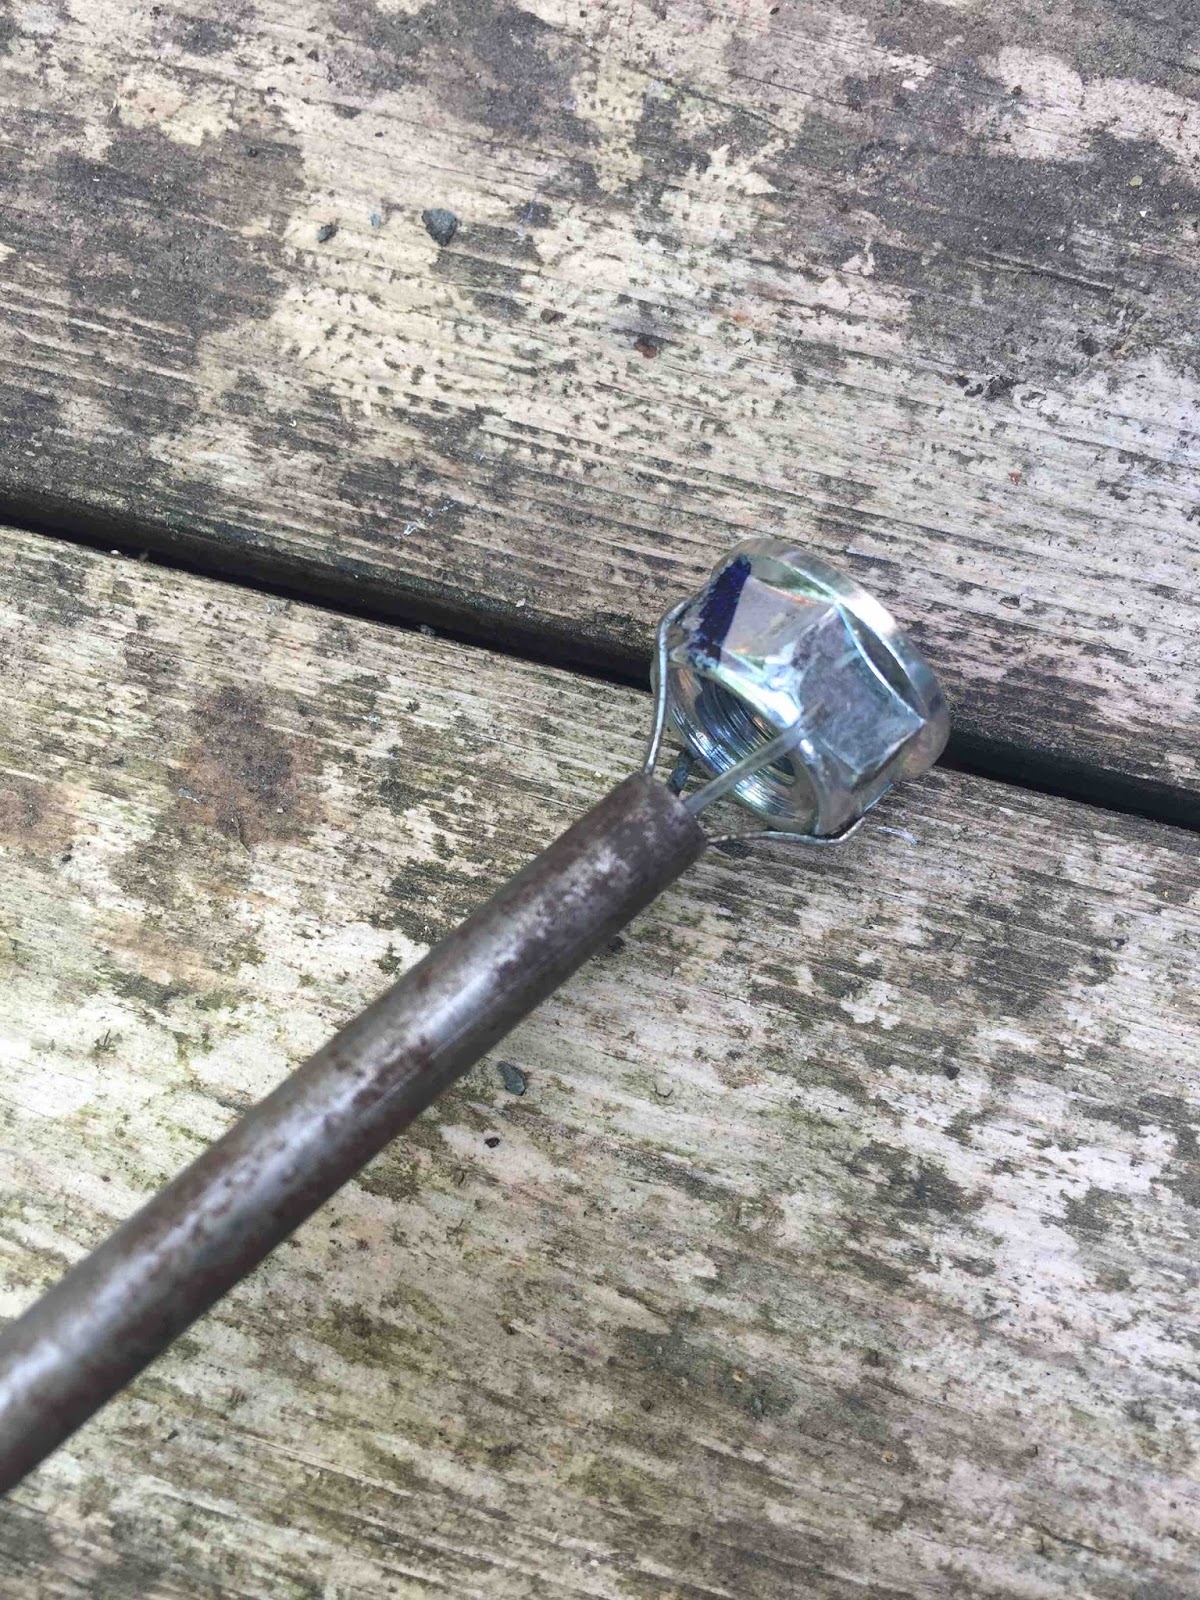
Next problem was putting the washer and nut on the top bolt. After dropping both several times and cursing, as I had to use a torch each time to find where they had ended up in the bike, I thought to use a “lost thing retrieval tool”. Clasping the nut in the claws and gently starting the thread. Worked first for the washer.
In the instructions (at time of fitting) stated that a dent needed to be bashed into the exhaust to prevent the swing arm hitting it with the increased travel. But the exhaust on my 2017 already has clearance so no need to do this, Really Raid also confirmed this.
While fitting the rear shock I decided to fit a Tutoro chain oiler. Having previously fitted the Rally Raid pannier racks I was able fix the Tutoro so that the rack can protect it. A cable tie makes sure nothing moves around.
Front Forks
I had been dreading this bit, but it was all surprisingly straight forward.
Once the tubes were removed the instructions said to hold them in a vice, but I improvised a little;
The only thing not covered in the instructions is that with the new springs fitted the front wheel extends by an extra 2”, so the brake hose and electrical wiring brackets on forks nolonger fit to their original positions. There is enough travel in the cables and brake hose, but nowhere to fix them. As I am going to be off roading I needed to make sure they are secure, so I made up a bracket extender from a bit of aluminium. Once fitted I made sure that there was good free movement and nothing was getting caught or rubbing. But as belt and braces I rapped some bicycle inner tube rubber around the bracket just to make sure.

Found some words by Jenny Morgan on the CB500X.com forum saying to take off the forks preload and then put on 4 to 10 turns each. The preload adjusters do not come fully out and apparently you need to be careful that you do not force past the zero position. The same forum thread also says that the pre-load on the front forks is there to adjust sag with respect to the rear sag adjustment to keep the geometry right (bike level) and does not increase the spring resistance, well that was worth reading.
Front mudguard
I fitted it no problem, but it did not look right. There was just a few mill of clearance between the tire and the mudguard at the back near the engine. Pulled and squeezed to see if anything was loose and then realised that I had not fitted the spacers to the rear bracket. Rally Raid did supply them cable tied to the place where they go, but I had cut them off and just forgot about them. Once fitted the mudguard sits correctly.
Barkbusters
I have the Barkbusters with Storm shields. These are general purpose and the fittings allow assembly in a multitude of ways, oh, so many ways. It took a lot of fitting and unfitting and fitting and unfitting till I managed to get them sorted. The main issue is getting it all set up so the various cables and pipes fit neatly and also so the brackets do not hit the bike or screen on full lock. I did fit the Rally Raid screen spacers which help a bit, but it is still tricky to do.
If you want to know why they are called BarkBusters then just have a look on youtube. There is a chap hitting a tree and just ripping the bark of the tree with no damage to him or his bike.
Sat Nav Mount
While I was at it I wanted to mount the Sat Nav in a better position, higher up so I did not have to look down to see it.
Cut a piece of aluminium tube and then filled one end with JB Weld. Upended the tube vertically and placed a washer, same diameter of the aluminium tube, underneath. When set did the same to the other end. Drilled out the centre of the washers and screwed in a threaded bar all the way through, so it sicks out about 1cm either end. Then fixed a spare Garmin mounting bracket I had. Hammerited it all with several coats of black paint then mounted it through the screen bracket holes. Used a couple of thumb nuts to secure in place.
And here is the result
2" higher overall, although it feels a lot taller when riding. The suspension upgrade makes a real difference on road, making the bike float along, but while still giving a good feeling of the road.
Just done a little off road to check all is ok, mainly handlebar position when standing, but will give it a bigger test soon. Those Rally Raid off road footpegs make standing really comfortable. The Rally Raid Top Clap also adds about 2"to the handle bar height that also helps when standing.


